



Quikrete Quick Setting Cement is a widely used material in construction repair, home improvement, and DIY projects. Thanks to its fast setting time, strong bonding performance, and easy application, it is ideal for installing fence posts, repairing concrete structures, anchoring bolts, and even stopping water leaks.
Many beginners often ask:
Do you need to mix Quikrete before pouring?
Can you pour the dry mix directly into the hole?
How long does it take to set?
Is it suitable for structural repairs?
This guide explains everything you need to know about how to use Quikrete Quick Setting Cement, including preparation, installation steps, emergency leak repair, and professional construction tips.
1 What Is Quikrete Quick Setting Cement?

Quikrete Quick Setting Cement is a high-performance rapid-setting cement product designed for construction, repair, and anchoring applications that require fast strength development. Unlike traditional concrete mixes that require longer curing times, quick setting cement is formulated to harden quickly while maintaining strong bonding and durability.
Because of its fast curing time and versatile performance, Quikrete Quick Setting Cement is widely used in DIY home improvement projects, structural repairs, post installations, and emergency maintenance work.
Below are the key features that make quick setting cement a preferred material for many construction and repair tasks.
Fast Setting and Rapid Strength Development
One of the most important advantages of Quikrete Quick Setting Cement is its rapid setting time. Under normal conditions, the material begins to harden within 20 to 40 minutes, allowing projects to progress much faster compared with traditional cement mixes.
This fast curing property makes it ideal for situations where quick stabilization or urgent repairs are required, such as installing fence posts, anchoring railings, or fixing damaged concrete surfaces. Contractors and homeowners often prefer quick setting cement because it reduces waiting time and allows the structure to support light loads much sooner.
The rapid strength gain also helps improve construction efficiency, especially for small projects that need to be completed within a short period.
High Strength and Long-Term Durability
Despite its fast setting time, Quikrete Quick Setting Cement provides excellent compressive strength and durability after curing. Once fully hardened, the material forms a strong bond with concrete, masonry, brick, and other construction surfaces.
This high-strength performance allows the cement to be used in demanding applications such as:
Anchoring bolts and metal fixtures
Repairing structural cracks in concrete
Reinforcing weakened concrete surfaces
Stabilizing posts and support structures
Because of its durable composition, quick setting cement can withstand weather exposure, moisture, and moderate mechanical stress, making it suitable for both indoor and outdoor construction environments.
Versatile Applications for Construction and Repair
Another key advantage of Quikrete Quick Setting Cement is its ampla gama de aplicações. The material can be used for both new installations and repair projects in residential, commercial, and industrial settings.
Common uses include:
Fence post and mailbox post installation
Concrete crack repair and patching
Anchoring bolts, railings, and metal supports
Filling holes in masonry or concrete surfaces
Emergency water leak repairs
Because of its strong bonding properties and quick curing ability, the cement performs well in many situations where fast repairs and reliable structural support are required.
Simple Application and Flexible Installation Methods
Compared with traditional concrete mixes, quick setting cement offers simplified installation procedures. In some applications, it can even be used with the dry-pour method, where the dry cement mix is poured into the hole before adding water.
This method is especially popular for projects such as fence post installation or sign post anchoring, because it eliminates the need for extensive mixing equipment. Once water is added, the material gradually absorbs moisture and begins the hydration process that causes the cement to harden.
The flexible application methods make quick setting cement convenient for both professional contractors and DIY homeowners.
Ideal for Emergency Repairs and Rapid Maintenance
Because of its quick setting properties, Quikrete Quick Setting Cement is frequently used for emergency repair situations where immediate action is required.
Exemplos incluem:
Sealing active water leaks in concrete structures
Repairing damaged concrete edges or corners
Stabilizing loose posts or supports
Filling cracks that could worsen if left untreated
In these situations, the ability of the cement to set quickly and form a solid bond helps prevent further structural damage and allows repairs to be completed efficiently.
2 Difference Between Quikrete and Regular Concrete
Many people assume that quick setting cement and regular concrete are the same material, but they actually serve different purposes in construction. Understanding the differences between these two materials can help you choose the right product for your project.
While both materials are cement-based and used for building or repairing structures, they differ in mixing methods, curing time, workability, installation process, and ideal applications.
Below are the most important differences between Quikrete Quick Setting Cement and traditional concrete mixes.
Mixing and Application Method
One of the biggest differences between quick setting cement and regular concrete is how the material is prepared and applied during construction.
Traditional concrete typically requires a full mixing process before placement. Contractors usually combine cement, sand, gravel, and water in a mixer to create a uniform concrete mixture. Once mixed, the concrete must be poured into forms and leveled before it begins to cure.
Quikrete Quick Setting Cement offers a more flexible application method. In some cases, especially for post installations or small repairs, the material can be placed directly into the installation area as a dry mix, and water can then be added afterward. This method, commonly called the dry-pour technique, simplifies the installation process and reduces preparation time.
Because of this simplified workflow, quick setting cement is often preferred for small construction jobs, DIY projects, and fast repairs where mixing large batches of concrete would be impractical.
Setting Time and Construction Speed
Another major difference lies in the curing and setting time.
Regular concrete typically requires several hours to begin setting and several days to achieve sufficient strength. For structural projects such as foundations, sidewalks, or large slabs, the concrete may require extended curing periods to reach full strength.
Quikrete Quick Setting Cement, on the other hand, is formulated to harden much more rapidly. The material begins to set within a short time after water is added, allowing the repaired or anchored structure to stabilize quickly.
This rapid curing characteristic is especially useful for projects that require fast installation or minimal downtime, such as securing posts, repairing damaged concrete areas, or anchoring hardware in place.
Because the material gains strength quickly, construction tasks can often be completed much faster than when using conventional concrete mixes.
Workability and Project Scale
Regular concrete is typically designed for large-scale construction projects where a material needs to remain workable for an extended period. Contractors need enough time to transport, pour, level, and finish the concrete before it begins to harden.
Examples of projects that commonly use regular concrete include:
Building foundations
Sidewalks and driveways
Concrete slabs and floors
Structural columns and beams
Quick setting cement is better suited for smaller repair or anchoring applications. Because it hardens quickly, it is not ideal for large pours that require extensive finishing or shaping.
Instead, quick setting cement works best for projects such as:
Concrete patching and surface repairs
Anchoring bolts or metal fixtures
Filling small holes in masonry or concrete
Stabilizing structural components
Choosing the appropriate material ensures that the construction process remains efficient and the final structure performs as expected.
Strength Development and Structural Performance
Both quick setting cement and regular concrete can develop strong bonds once fully cured, but the strength development process differs significantly.
Traditional concrete gains strength gradually over time through a hydration reaction that can continue for several weeks. This gradual curing process helps large concrete structures achieve maximum durability and load-bearing capacity.
Quick setting cement is formulated to achieve rapid early strength, which allows structures to stabilize quickly after installation. While it may not always replace large structural concrete pours, it performs extremely well for localized repairs, anchoring applications, and reinforcement tasks.
For many repair projects, the ability to develop early strength quickly is actually more valuable than slow long-term curing.
Installation Efficiency and Labor Requirements
From a practical standpoint, quick setting cement can significantly improve construction efficiency, especially in situations where speed and simplicity are important.
Regular concrete often requires:
Mixing equipment
Transportation tools
Formwork preparation
Finishing tools
These steps increase labor requirements and project time.
Quick setting cement typically requires minimal tools and preparation, making it a convenient option for both contractors and homeowners working on small construction tasks.
This ease of use is one reason why quick setting cement has become a popular solution for home improvement repairs and small construction projects.
3 Preparation Before Application
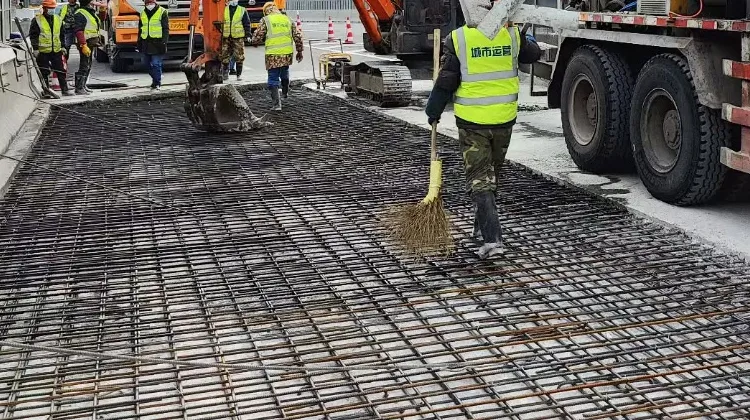
Before applying Quikrete Quick Setting Cement, proper preparation is essential to ensure strong bonding, structural stability, and long-lasting repair results. Although the material is designed for fast installation, taking a few minutes to prepare the work area, tools, and surface conditions can significantly improve the performance of the cement.
The following preparation steps help ensure the cement sets properly and adheres effectively to the surrounding concrete or soil.
Gather the Necessary Tools and Materials
Before starting the project, it is important to prepare all the tools and materials needed for the application process. Because quick setting cement begins to harden relatively quickly, having everything ready in advance helps avoid delays during installation.
Common tools and materials include:
Mixing bucket or container
Trowel or masonry tool
Shovel or digging tool (for post installation)
Measuring container for water
Protective gloves and safety glasses
Clean water supply
For projects such as fence post installation or anchoring structural supports, additional tools like a level or support braces may also be necessary to ensure proper alignment before the cement hardens.
Preparing the correct tools in advance helps streamline the application process and ensures the cement can be placed and shaped before it begins to set.
Clean and Prepare the Surface Area
Proper surface preparation plays a critical role in ensuring that quick setting cement bonds effectively with existing materials. Dirt, loose debris, dust, grease, or old damaged concrete can prevent proper adhesion and reduce the overall strength of the repair.
Before applying the cement, thoroughly clean the work area by removing loose particles, broken concrete pieces, and contaminants from the surface. A stiff brush, compressed air, or water rinse can be used to expose a clean and solid base.
If the cement is being applied to an existing concrete structure, lightly dampening the surface can help improve bonding and prevent the surrounding concrete from absorbing moisture too quickly from the fresh mix.
A clean and stable surface allows the quick setting cement to form a stronger mechanical bond once it begins curing.
Prepare the Hole or Repair Area
For projects such as fence post installation, railing supports, or signpost anchoring, the hole or cavity where the cement will be placed must be properly prepared.
The hole should be wide and deep enough to support the structure securely. Loose soil, rocks, and debris inside the hole should be removed before adding the cement mixture.
In some cases, adding a small layer of gravel at the bottom of the hole can improve drainage and help stabilize the base. This step is especially useful in outdoor installations where water accumulation could affect long-term durability.
Properly preparing the installation area ensures that the quick setting cement can distribute evenly and provide a stable foundation once hardened.
Measure the Correct Water Amount
The water-to-cement ratio plays an important role in the performance of quick setting cement. Adding too much water can weaken the final strength of the material, while too little water may prevent proper hydration and curing.
If the project requires mixing the cement before application, carefully measure the recommended amount of clean water according to the product instructions. Gradually add the cement mix while stirring to achieve a smooth and workable consistency.
Maintaining the proper mix ratio helps ensure that the cement sets within the expected time frame and reaches its intended strength.
Check Weather and Temperature Conditions
Environmental conditions can influence how quickly cement sets and cures. Extremely hot weather can accelerate the hydration process, while cold temperatures may slow down the setting time.
Before starting the project, it is helpful to check the outdoor temperature and weather conditions. For best results, quick setting cement is typically applied when temperatures are within a moderate working range.
If working in hot conditions, preparing smaller batches of cement can help prevent the mixture from setting too quickly. In colder environments, protecting the fresh cement from freezing temperatures during the initial curing period is recommended.
Monitoring weather conditions helps ensure the cement cures properly and achieves long-term durability.
4 Layered Application Guide

Applying Quikrete Quick Setting Cement correctly is important for achieving strong structural support and long-lasting repairs. Because the material begins to harden quickly, it is recommended to follow a clear step-by-step process to ensure proper placement, compaction, and curing.
The following layered application guide explains the general procedure used for common projects such as post installation, concrete patching, and anchoring structural components.
Step 1: Position the Structure or Prepare the Repair Area
Before adding the cement, place the object that will be anchored in its correct position. For example, when installing a fence post or mailbox post, the post should be centered inside the prepared hole and held vertically using temporary supports or braces.
For concrete repair applications, ensure the damaged area has already been cleaned and prepared so the new cement can bond properly to the existing surface.
Taking time to align the structure correctly at this stage prevents adjustments later, since the cement will begin to set relatively quickly.
Step 2: Add the Quick Setting Cement in Layers
Once the structure is properly positioned, gradually pour the quick setting cement into the prepared hole or repair cavity. Instead of filling the entire area at once, it is often helpful to apply the material in small layers.
Layered placement allows the cement to distribute more evenly and reduces the chances of trapped air pockets forming inside the mix. Each layer can be lightly compacted using a trowel or rod to improve density and structural strength.
This method is especially useful for deeper holes or larger repair sections where uniform support is required.
Step 3: Add Water to Activate the Cement
After the cement mix has been placed, the next step is to activate the hydration process by adding clean water. In many quick setting cement applications—such as fence post installation—the dry-pour method can be used, where water is poured directly over the dry mix.
The water slowly penetrates the cement powder and initiates the chemical reaction that causes the material to harden. It is important to add water evenly across the surface so that the entire mixture becomes properly hydrated.
Ensuring the correct moisture level allows the cement to set within the expected timeframe and achieve optimal strength.
Step 4: Adjust and Stabilize Before Initial Setting
During the first several minutes after adding water, the cement remains workable. This brief window allows time to make small adjustments to the installed structure.
For example, fence posts or sign posts should be checked with a level to confirm they remain straight and properly aligned. If necessary, temporary supports can be used to hold the structure steady while the cement begins to set.
Making these adjustments early helps avoid structural alignment issues once the cement becomes fully hardened.
Step 5: Allow the Cement to Cure Properly
Although quick setting cement begins to harden within a short time, proper curing is still important for long-term strength and durability. The material will typically achieve initial stability within about 20 to 40 minutes, depending on environmental conditions.
However, heavier loads or structural stress should generally be avoided until the cement has had additional time to cure and gain strength. Allowing the material to cure naturally ensures the bond between the cement and surrounding surfaces becomes fully developed.
Proper curing ultimately improves the durability and performance of the finished installation or repair.
5 Emergency Leak Plugging
Quick Setting Cement can be an effective solution for emergency water leak repairs in concrete and masonry structures. Because the material hardens rapidly after contact with water, it is often used to seal small leaks in foundations, basement walls, water tanks, and other concrete surfaces.
When applied correctly, the cement expands slightly during the curing process, helping to form a tight seal that blocks water infiltration and prevents further structural damage.
Identify the Source of the Leak
Before applying the cement, it is important to locate the exact point where water is entering the concrete surface. Leaks commonly occur along cracks, joints, or small holes in concrete walls and floors.
Carefully inspect the area and remove any loose debris or damaged material surrounding the leak. If necessary, use a chisel or small tool to slightly widen the crack or opening so the cement can penetrate deeper into the repair area.
Creating a clean and defined repair space helps the quick setting cement form a stronger seal once it begins to harden.
Prepare the Cement for Immediate Application
Because emergency leak repairs require fast action, quick setting cement is typically mixed in small batches so it can be applied immediately. The mixture should have a thick, putty-like consistency that can be easily pressed into cracks or openings.
When dealing with active leaks, it is important to prepare the cement quickly, as the material will begin its hydration process soon after mixing with water.
Working with smaller portions of cement allows better control during the repair process and prevents unused material from hardening prematurely.
Press the Cement Firmly into the Leak Area
Once the cement mixture is ready, it should be firmly pressed into the leaking crack or hole using a gloved hand or masonry tool. The material should be compacted tightly to eliminate gaps where water could continue to pass through.
In many emergency leak repair situations, steady pressure may need to be applied for several minutes while the cement begins to set. As the material hardens, it gradually forms a dense barrier that blocks the water flow.
Proper compaction ensures the cement bonds securely to the surrounding concrete surface.
Allow the Cement to Set and Monitor the Repair
Quick setting cement typically begins to harden within a short period, allowing the leak to be sealed relatively quickly. Once the initial set occurs, the repaired area should be monitored to confirm that water infiltration has stopped.
If necessary, additional cement can be applied over the repair area to reinforce the seal and provide extra protection against future leaks.
After the cement has fully cured, the repaired section can be further protected with waterproof coatings or sealants if long-term moisture resistance is required.
6 Structural Repair Applications
Quick Setting Cement is widely used for structural repair and reinforcement in concrete and masonry construction. Thanks to its rapid strength development and strong bonding ability, it can restore damaged sections of concrete surfaces while minimizing downtime during maintenance or repair work.
This material is commonly used in both residential construction projects and commercial infrastructure repairs, particularly when fast stabilization is required.
Below are several common structural repair applications where quick setting cement performs effectively.
Repairing Cracks in Concrete Structures
One of the most common uses of quick setting cement is repairing cracks in concrete walls, floors, and foundations. Over time, concrete can develop cracks due to shrinkage, temperature changes, moisture exposure, or structural stress.
Quick setting cement can be applied directly into prepared cracks to restore the integrity of the damaged area. Once the material cures, it forms a strong bond with the surrounding concrete, helping to stabilize the surface and prevent further deterioration.
This type of repair is often used for basement walls, driveways, concrete slabs, and retaining walls where structural durability is important.
Patching Damaged Concrete Surfaces
Concrete surfaces can become damaged from heavy loads, impact, weather exposure, or long-term wear. Quick setting cement provides an effective solution for patching spalled or broken concrete areas.
The material can be used to fill holes, repair chipped edges, and rebuild small sections of missing concrete. Because it hardens quickly, the repaired surface can regain its strength faster than traditional concrete patching materials.
This makes it suitable for repairing steps, sidewalks, curbs, garage floors, and other load-bearing concrete surfaces.
Anchoring Bolts and Metal Fixtures
Another important structural application of quick setting cement is anchoring bolts, railings, and metal support fixtures into concrete or masonry surfaces.
When installing structural components such as handrails, fence posts, signposts, or equipment mounts, the cement can be poured into drilled holes to secure anchor bolts or steel rods in place. As the cement cures, it tightly bonds with both the concrete and the metal hardware.
This anchoring method provides reliable stability for structural supports, safety railings, and construction hardware installations.
Reinforcing Weak or Eroded Concrete Areas
In older structures, certain areas of concrete may become weakened due to water damage, erosion, or repeated mechanical stress. Quick setting cement can be applied to reinforce these vulnerable sections before the damage spreads further.
By filling gaps, strengthening edges, and restoring the structural profile of the concrete surface, the cement helps extend the service life of the structure.
This type of reinforcement is commonly performed on bridge edges, foundation corners, stair edges, and structural joints where maintaining load-bearing capacity is critical.
7 Core Steps: Fence Post Installation Example
Installing a fence post is one of the most common applications for Quick Setting Cement. Because the material hardens rapidly and provides strong support, it is widely used for fence posts, mailbox posts, and signposts in residential and outdoor construction projects.
The following example outlines the core steps for installing a fence post using quick setting cement to ensure proper alignment, stability, and long-term durability.
Step 1: Dig a Proper Fence Post Hole
The first step is to dig a hole deep enough to support the fence post securely. In most cases, the hole depth should be approximately one-third of the total post height, which helps provide sufficient structural stability.
The diameter of the hole should also be wider than the post itself to allow space for the cement mixture to surround the post evenly. Removing loose soil, rocks, and debris from the bottom of the hole helps create a solid base for the installation.
Proper hole preparation is important for preventing post movement and ensuring the fence remains stable over time.
Step 2: Position and Align the Fence Post
After the hole has been prepared, place the fence post in the center of the hole and adjust it to the correct vertical position. A level can be used to ensure the post remains straight before adding the cement.
Temporary braces or supports can be installed to hold the post steady during the installation process. Maintaining proper alignment at this stage is essential because the quick setting cement will begin to harden relatively quickly once water is added.
Correct positioning ensures the finished fence line will appear straight and structurally secure.
Step 3: Add Quick Setting Cement Around the Post
With the post properly positioned, pour the quick setting cement into the hole around the base of the post. The material should be distributed evenly so it surrounds the post on all sides.
For deeper holes, the cement can be added gradually to ensure better compaction and uniform support. This helps eliminate voids and improves the structural stability of the post foundation.
Quick setting cement is especially convenient for fence installation because it reduces the need for extensive mixing or complicated equipment.
Step 4: Add Water to Activate the Cement
Once the cement mix has been placed around the post, add clean water evenly over the surface. The water penetrates the cement mix and begins the hydration process that causes the material to harden.
This process is commonly known as the dry-pour method, which is frequently used for fence post installation because it simplifies the overall procedure.
Ensuring that the water is distributed evenly helps the cement cure properly and develop sufficient strength.
Step 5: Allow the Cement to Set and Stabilize the Post
After water has been added, the quick setting cement will begin to harden within a short time. During this period, the fence post should remain supported and aligned until the cement gains enough strength to hold it in place.
Depending on environmental conditions, the initial set typically occurs within 20 to 40 minutes, allowing the post to become stable relatively quickly.
Once the cement has fully cured, the fence structure can support normal loads and withstand outdoor environmental conditions.
8 Setting Time and Environmental Conditions
Typical curing times:
Initial set: 20–40 minutes
Light load: about 1 hour
Full strength: 24 hours
Recommended Temperature
Best installation temperature:
50°F – 90°F (10°C – 32°C)
Extreme temperatures may affect curing speed.
9 Safety Precautions and Construction Tips
When working with cement products:
Wear gloves and safety glasses
Avoid skin contact
Mix small batches to prevent premature hardening
Increase water slightly in hot weather
Allow longer curing in cold conditions
These precautions help ensure safe and successful installation.
10 Conclusion
Quikrete Quick Setting Cement is a fast, durable, and easy-to-use construction material.
It is ideal for:
Installing fence posts
Repairing damaged concrete
Anchoring bolts
Performing emergency leak repairs
With proper preparation and installation techniques, you can complete many construction and DIY projects efficiently and achieve long-lasting results.


 Portuguese
  English
  Russian
  Arabic
  Vietnamese
  Spanish
  French
  Japanese
  Chinese